If you're wanting to get started with Blogger, there are a few tools/tips I have to get started.
- Microsoft Word -> Google Drive/Docs -> Blogger
- Since making large posts with a lot of content in Blogger can have unintended consequences (potentially resulting in data loss), I create the content in Microsoft Word. When I am ready to publish, I upload the Word document to a folder in my Google Drive, open the file and go to File -> Save as Google Docs. Then with the new file that is created, content can be copy/pasted directly into a Blogger blog post.
- From this point I make sure that all hyperlinks open in a new window.
- Previewing the post, I resize any images that go over the side of the blog content area (usually resized to extra large). Additionally I resized the default width from the theme I used as my template to 1100 px to help with fitting larger images.
- Merge Images Online with Pinetools
- The first image in a blog post is usually used as the preview thumbnail when sharing a link to the post in other places. If there are multiple interesting visuals, it can help to use this tool to merge images together for eye-catching thumbnail previews that could help draw visitors to the blog. Typically I would merge images together vertically but there have been some posts where I have used a combination of horizontal/vertical to combine 3 images (example images courtesy of sgeier.net).
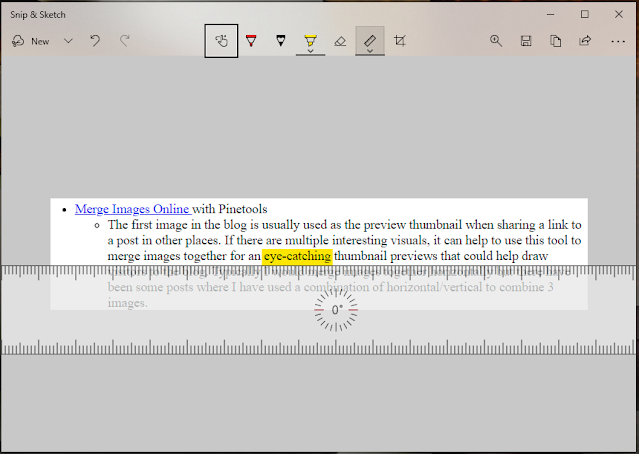
- Snip & Sketch (with ruler)
- Snip & Sketch is included with Windows 10. It can be activated by pressing Win + Shift + S
- It has a built-in ruler that can be used to draw straight lines with the highlighter or pen/pencil. It can also be rotated at any angle. A protractor is available as well to help with drawing circles.
- Use CSS to apply your favorite font for the page title
- Find a font on Google Fonts or CDN Fonts. I used the Stargate font from CDN Fonts
- Backup your theme and choose the option Edit HTML
- Copy the standard embed code and paste it into your theme under the <head> section. Be sure to put a forward slash ( / ) before the closing of the HTML tag ( > )


