
Back in 2017, when f.lux released the HTTP API feature, I documented my findings with it but I didn’t know what exactly to do with it. I’m not going to link to it because it’s not that good. I had wanted the ability to control Alexa powered lights with Node-RED, but I gave up my search on this for quite some time apparently. After discovering the Alexa remote control functionality with the node-red-contrib-alexa-remote2-v2 node, and writing about using the Echo Button as a Toggle Switch, I realized I could finally do something with the f.lux HTTP API. So here’s how to do it:
Make a HTTP in (POST) node and give it a URL suffix.
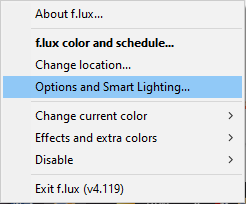
In f.lux, go to options and smart lighting
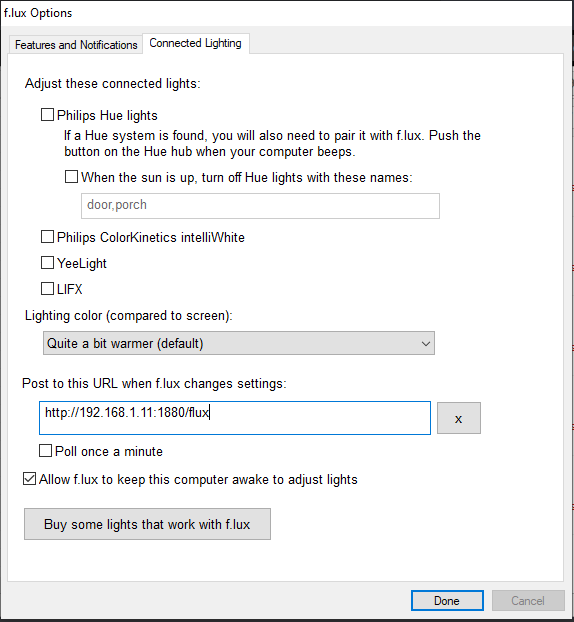
On the Connected lighting tab, enter the URL specified. It will be the Node-RED URL followed by the suffix specified. http://192.168.1.11:1880/flux

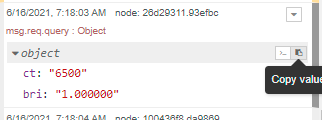
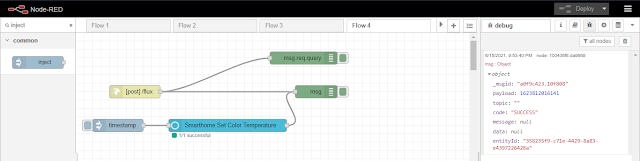
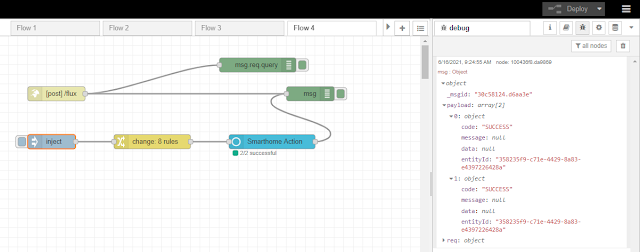
Create a debug node, connect the HTTP node, and click the Deploy button (remember to do this moving forward any time you want to see the results from a change) and wait for the color temperature to change in f.lux. At this time manual changes to F.lux do not get posted to the HTTP interface. Using a debug output of msg.req.query you can see the values we will need to work with.
You can capture the msg.req.query output of the debug node and save it for later testing
{"ct":"6500","bri":"1.000000"}

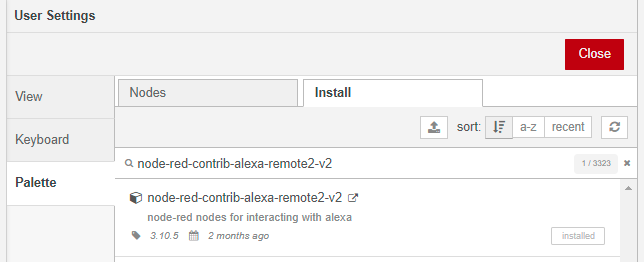
To get the control node ready, we need to install the node. Click on Manage palette in the top-right menu.
Install the node-red-contrib-alexa-remote2-v2 node.
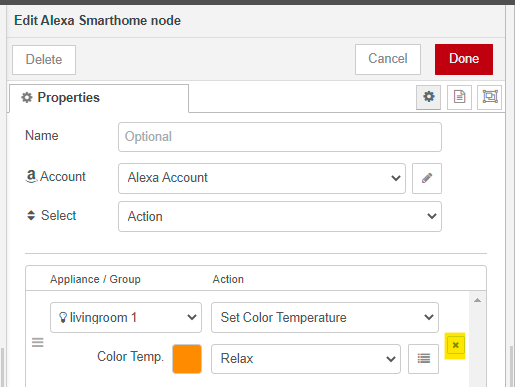
Add an Alexa Smarthome node to the flow. Configure the Alexa account for the node and pick a device or group that you want to control. To configure the Alexa account you will need to open the URL provided after deploying the node, and access sign in to generate a cookie. This cookie is stored in a text file that you will need to specify and make sure you have permissions to write to. If lights stop being controlled you may need to manually refresh the cookie by signing in to the URL again.
Add an inject node to the flow to trigger the remote node. Click the inject button, and note the entityId


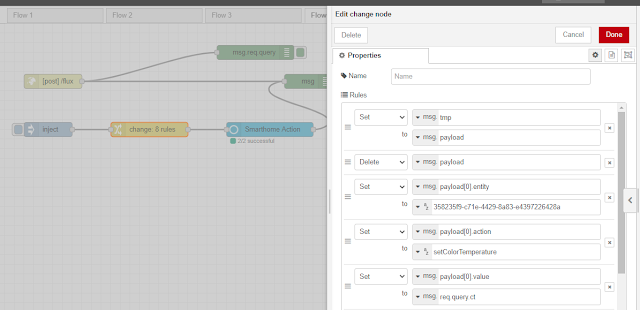
Create a change node. 1) Store msg.payload into msg.tmp, then delete msg.payload (many things require a payload with only the data that’s expected). 2) Set msg.payload[0].action to 3) Set the value for msg.payload[0].entity (the remote node takes an array format to send multiple control commands at once) to the entityId described earlier. Set msg.payload[0].action to msg.req.query.ct.
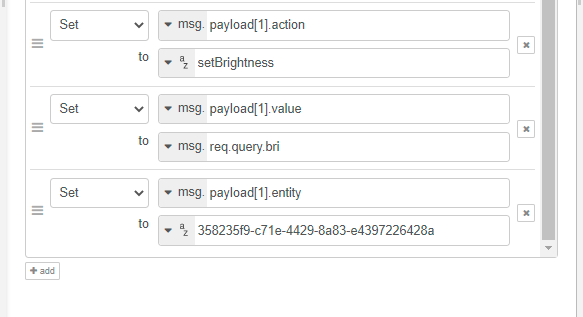
Additionally, add rules to map the brightness value.
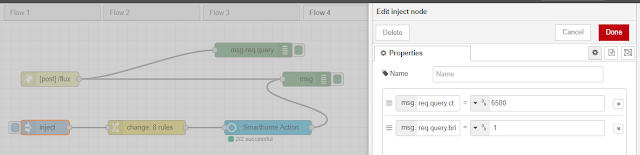
Test the sample data by configuring the inject node you created with the sample data from earlier. {"ct":"6500","bri":"1.000000"}. Be sure to set the data type as number.
Delete the test action from the remote node
Click the inject button to test the data
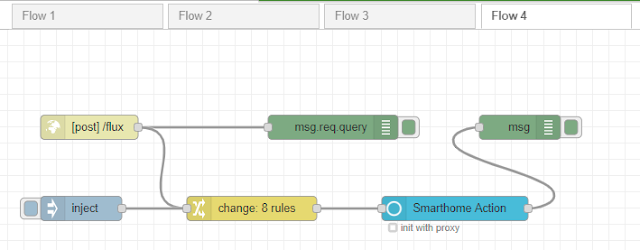
Now finally, connect the HTTP node to the change node, and Deploy the flow (hopefully) one last time. Next time f.lux changes, the specified light should change and you’ll see the output in the debug logs (I waited for it – it works). In the future f.lux may be updated to ensure API push occurs even during manual changes. We may also see “Effects and extra colors” data available through the HTTP API. If they do, I will create an updated guide to include “mood lighting” with f.lux.
No comments:
Post a Comment