In a previous post, I went over the importance of using TLS whenever possible and demonstrated some steps to secure local applications such as Node-RED and Domoticz with self-signed SSL certificates. Since I have a domain name (with Ionos) that I use for my home lab, I figured I would try out the LetsEncrypt/certbot functionality built into DietPi OS. Typically, an SSL certificate would have a Certificate Signing Request (CSR) that that is manually generated then submitted to the Certificate Authority (CA) in order to obtain the SSL certificate and private key that is needed to configure TLS/HTTPS.
Certbot automates most of this process, and automatically configures (some) web applications to use the new SSL cert. When running the process on DietPi OS, the Pi-hole installation is automatically secured. We will go through the steps to make this work, as well as manually configuring Node-RED and Domoticz to use the SSL cert/key moving forward. LetsEncrypt certificates are good for only 3 months, so you would need to repeat this process about every 2.5 months (so you may want to stick with self-signed certs if this is too inconvenient). If you are serving a public facing web server, the renewal process is automatic. Additionally, if you wish to have a longer-term certificate (up to 1 year for most domain providers), you could look into the SSL certificate options provided by your domain provider (usually a wildcard cert is free) and learn how to manually configure SSL certs for your resources (which doesn’t rely on the DNS/port 80 validation that certbot does).
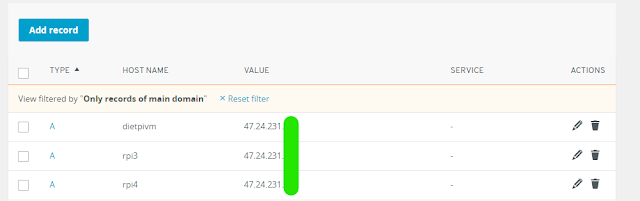
In your domain management DNS records, add “A” record(s) for the subdomains you wish to use (to your public IP address found by searching “my ip address” in a search engine). This is required for the LetsEncrypt certbot verification to work.
In your router, create a port forwarding rule to forward port 80 to the IP address of the device you are securing. This is only temporary to complete the certbot process. Some ISPs may block port 80; if this is the case you may have luck trying
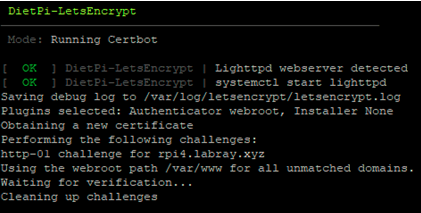
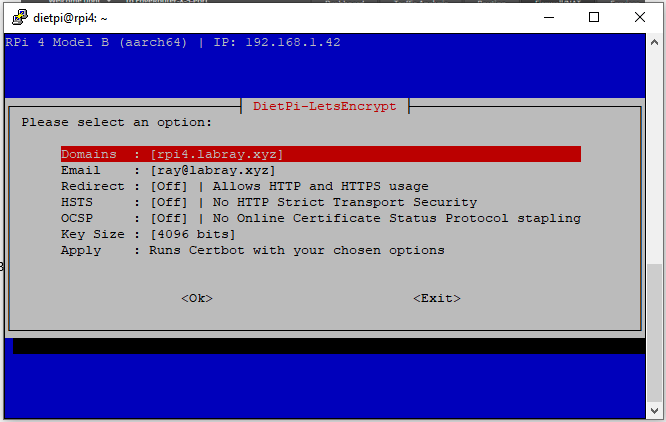
Run the command sudo dietpi-letsencrypt. Configure the options and select Apply.
When the configuration completes, take note of the certificate and key paths. Repeat steps 2-3 for any other subdomains/devices you wish to secure. IMPORTANT: The port forwarding rule from step 2 should now be deleted/disabled if this is a service you only intend to access on your local area network. Although the DietPi documentation advises to keep port 80 forwarded for automatic renewal, in the day and age of Zero Day exploits such as Log4Shell, and the fact that these are services I am only using in my internal network, I prefer to do the renewal manually. You may also wish to delete the DNS records as well, as they can be easily recreated at the time the renewal will need to be completed.
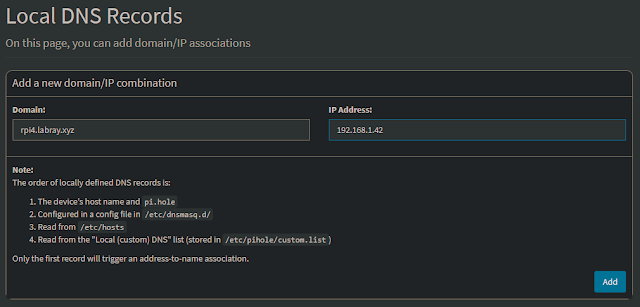
To access the DNS name locally, a mapping would need to be created in Pi-hole Local DNS -> DNS Records
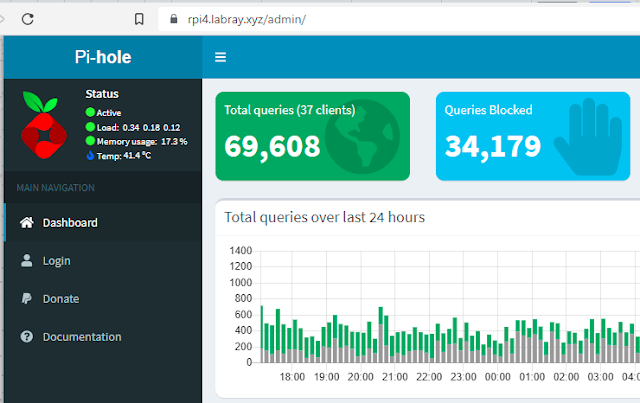
For this to take effect right away, you may need to clear your local DNS cache by running a command on the machine your browser is running on, such as ipconfig /flushdnsAccessing Pi-hole with the DNS name with HTTPS, the web interface is now secured with a proper SSL cert that the browser does not warn about.
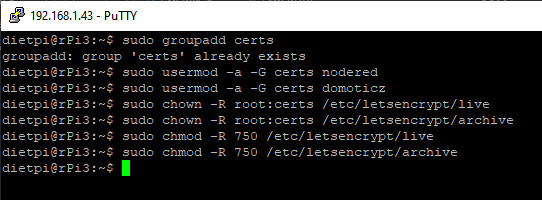
At this point, for other applications to use the cert/key, we need to create a certs user group, add the Node-RED user account to the group, and grant the group permissions to read the cert/key files. This ensures that when the certbot renewal is manually run, the applications will continue to use the renewed certificate with no further configuration required.
sudo groupadd certs


sudo usermod -a -G certs nodered
sudo usermod -a -G certs domoticz
sudo chown -R root:certs /etc/letsencrypt/live
sudo chown -R root:certs /etc/letsencrypt/archive
sudo chmod -R 750 /etc/letsencrypt/live
sudo chmod -R 750 /etc/letsencrypt/archive
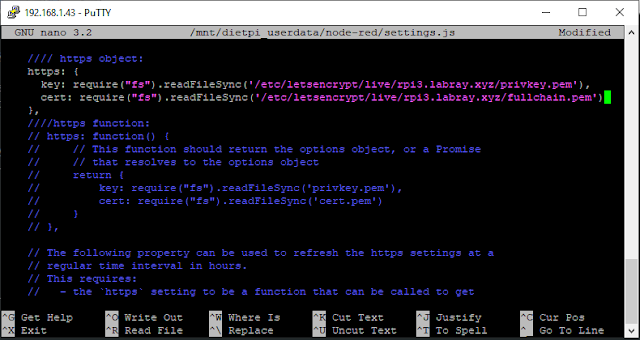
To add the certificate to Node-RED, edit the settings.js file
sudo cp /mnt/dietpi_userdata/node-red/settings.js /mnt/dietpi_userdata/node-red/settings.js.bak
sudo nano /mnt/dietpi_userdata/node-red/settings.js
Edit the lines used in the previous guide to specify the self-cert/key to instead use the cert/key files provided by the LetsEncrypt wizard. Use ctrl-X to save.Restart the Node-RED service and access Node-RED via the HTTPS URL and port 1880
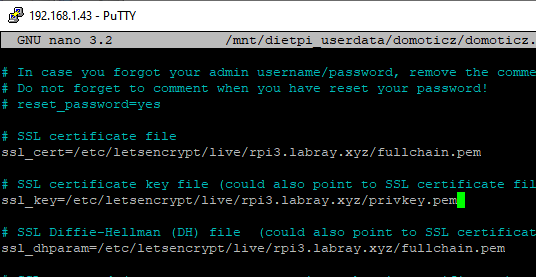
sudo systemctl restart node-redFor Domoticz, edit the domoticz.conf configuration file. Update the 3 SSL configuration lines as follows (with the cert/key file paths provided by the LetsEncrypt wizard). Save with ctrl-X
sudo nano /mnt/dietpi_userdata/domoticz/domoticz.confRestart the Domoticz service
sudo systemctl restart domoticz
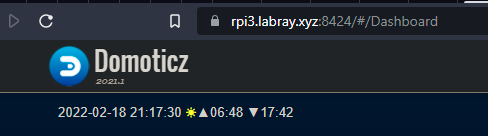
Domoticz is now accessible via the HTTPS URL on port 8424

When it’s time for certificate renewal, you should get an email from LetsEncrypt (about half month before renewal). At this point some steps will need to be repeated. If the IP address provided by your ISP has changed (or if you deleted the DNS record), step 1 will need to be performed again. Steps 2 and 3 will need to be performed again to complete the renewal (just be sure to disable/delete the port forwarding rule when completed). Keep in mind that services will need to be restarted (or reboot the OS) to pick up the renewed certificate.
The certbot renewal process will automatically attempt to run, which in the case you’re serving a public web server, should take care of itself so long as the DNS record and port forwarding exists. Additionally, it is possible to perform validation with a DNS challenge, but this would require your DNS provider has an API and you would need build this into your certbot setup.
No comments:
Post a Comment